Rich HTML 5 Hybrid Mobile Apps development using Ionic SDK
Ionic is a framework which allows us to create rich HTML 5 hybrid mobile applications. Ionic SDK allows you to create iOS and Android framework applications with predefined templates.
Ionic allows us to create, build and run hybrid applications using command line.
There are few prerequisites to create ionic applications these are: Node.js, Cordova CLI and chrome based ripple emulator (if you want to run the application without a physical device).
1. Node.js: Node.js is a platform built on Chrome's JavaScript runtime for easily building fast, Scalable network applications. Node.js uses an event-driven, non-blocking I/O model that makes it lightweight and efficient, perfect for data-intensive real-time applications that run across distributed devices.
Download and install Node.js from official site. https://nodejs.org/
2. Cordova: Cordova CLI can be installed using npm command line as below
> npm install -g cordova3. Ripple Emulator (Optional): Ripple is a multi-platform mobile environment emulator that is custom-tailored to mobile HTML5 application development and testing. Ripple offers the ability to look under the hood of your mobile application, giving you full visibility into what it is doing. It also allows for the use of existing tools to perform JavaScript debugging, HTML DOM inspection, automated testing, as well as multiple device and screen resolution emulation in real-time without having to redeploy the mobile application or restart the emulator.
Add Ripple Emulator from https://chrome.google.com/webstore/detail/ripple-emulator-beta/geelfhphabnejjhdalkjhgipohgpdnoc
Now we have installed all prerequisites and ready to install Ionic framework. To install Ionic, open console as administrator and run below command:
> npm install -g ionicNote: -g used to install ionic globally.
Once Ionic framework installed you are ready to create projects for windows, Android as well as for iOS, there are 7 predefined templates these are:
a) tabs (Default)
b) sidemenu
c) maps
d) salesforce
e) tests
f) complex-list
g) blank
> ionic start MyApp sidemenuHere MyApp is the name of your application you want to create with sidemenu template.
Console will ask to create ionic account for push notification as below
Create an ionic.io account to send Push Notifications and use the Ionic View app?
(Y/n): Y
Say Y if you want, Y will open a browser to create an account in ionic.io
By giving N will complete the project creation without signup process
Navigate to your application directory to add platform targets for e.g. iOS and android, you can give only one platform if you need also can be given both together
> cd MyApp
>ionic platform ios android
To run the application in ripple emulator use below command
> ionic serveIt may ask you to select address as
Multiple addresses available.
Please select which address to use by entering its number from the list below:
a) 100.92.50.18 (Ethernet)
b) localhost
Address Selection: localhost
Note: If you will not see the mobile emulator then click on ripple icon in the browser tab will open ripple mission control, click on enable and in the main screen select Mobile Web, devices option will let you to choose device as your choice.
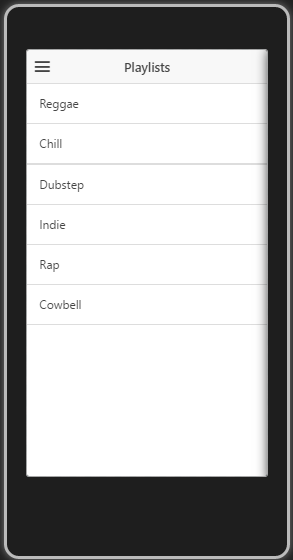
Output will be as below:
To build the application targeted to an platform use below command
>ionic build androidTo run the application on an emulator or physical device use below command
>ionic emulate androidSome useful commands:
1) start .......... Starts a new Ionic project in the specified PATH
2) serve .......... Start a local development server for app dev/testing
3) platform ....... Add platform target for building an Ionic app
4) run ............ Run an Ionic project on a connected device
5) emulate ........ Emulate an Ionic project on a simulator or emulator
6) build .......... Locally build an Ionic project for a given platform
7) plugin ......... Add a Cordova plugin
8) upload ......... Upload an app to your Ionic account
9) share .......... Share an app with a client, co-worker, friend, or customer
10) lib ............ Gets Ionic library version or updates the Ionic library
11) setup .......... Configure the project with a build tool (beta)
12) io ............. Integrate your app with the ionic.io platform services (alpha)
13) push ........... Upload APNS and GCM credentials to Ionic Push (alpha)
14) config ......... Set configuration variables for your ionic app (alpha)
15) browser ........ Add another browser for a platform (beta)
16) service ........ Add an Ionic service package and install any required plugins
17) add ............ Add an Ion, bower component, or addon to the project
18) remove ......... Remove an Ion, bower component, or addon from the project
19) list ........... List Ions, bower components, or addons in the project
20) ions ........... List available ions to add to your project
21) templates ...... List available Ionic starter templates
22) info ........... List information about the users runtime environment
23) help ........... Provides help for a certain command
24) link ........... Sets your Ionic App ID for your project
25) hooks .......... Manage your Ionic Cordova hooks
26) state .......... Saves or restores state of your Ionic Application using the package.json file
27) docs ........... Opens up the documentation for Ionic
28) resources ...... Automatically create icon and splash screen resources (beta) Put your images in the ./resources directory, named splash or icon. Accepted file types are .png, .ai, and .psd. Icons should be 192x192 px without rounded corners. Splashscreens should be 2208x2208 px, with the image centered in the middle.
