Installing & Customizing Windows Terminal
Step 1: Download Windows Terminal from below link
Note: Make sure you are reading system requirements and its meets the criteria.
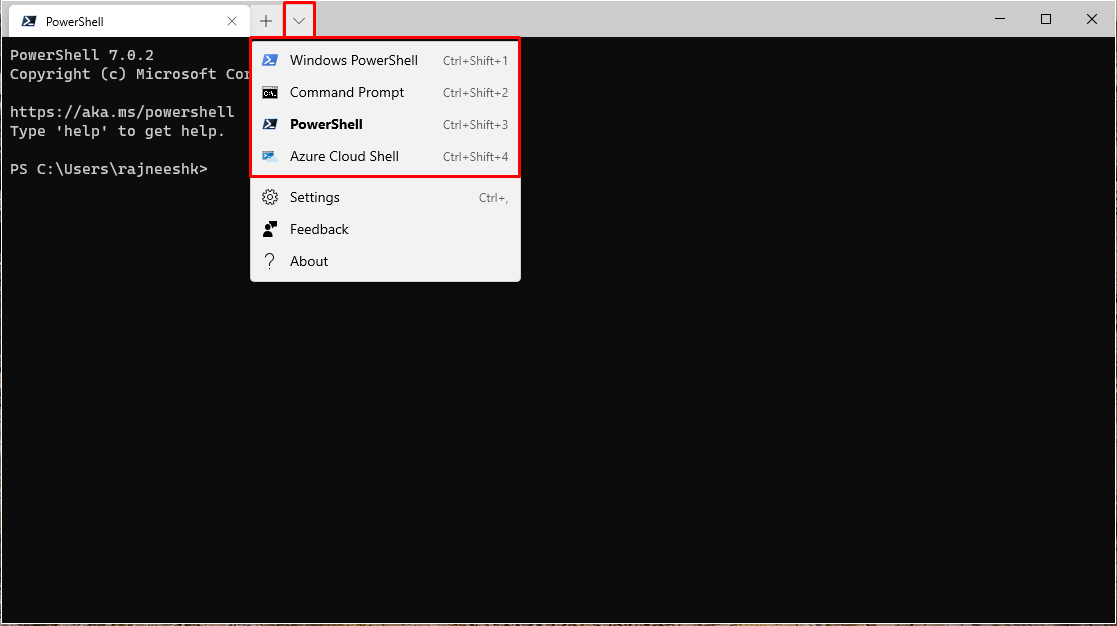
Step 2: Open Window Terminal and it will be opened with default UI. As shown below
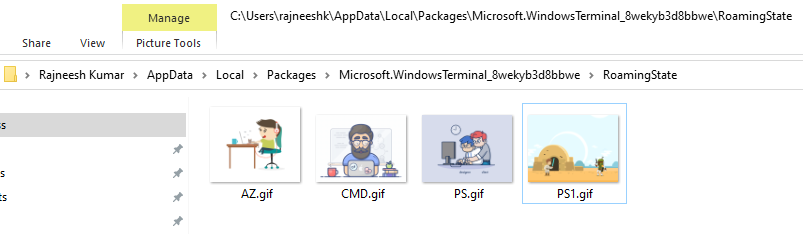
Step 3: Now let’s have some customization, for that I have downloaded, few gif images which I will apply as background of each terminal.
Step 4: Place the images to “%LOCALAPPDATA%\Packages\Microsoft.WindowsTerminal_8wekyb3d8bbwe\RoamingState” then one you want to use, I am using below 4 gif images as below
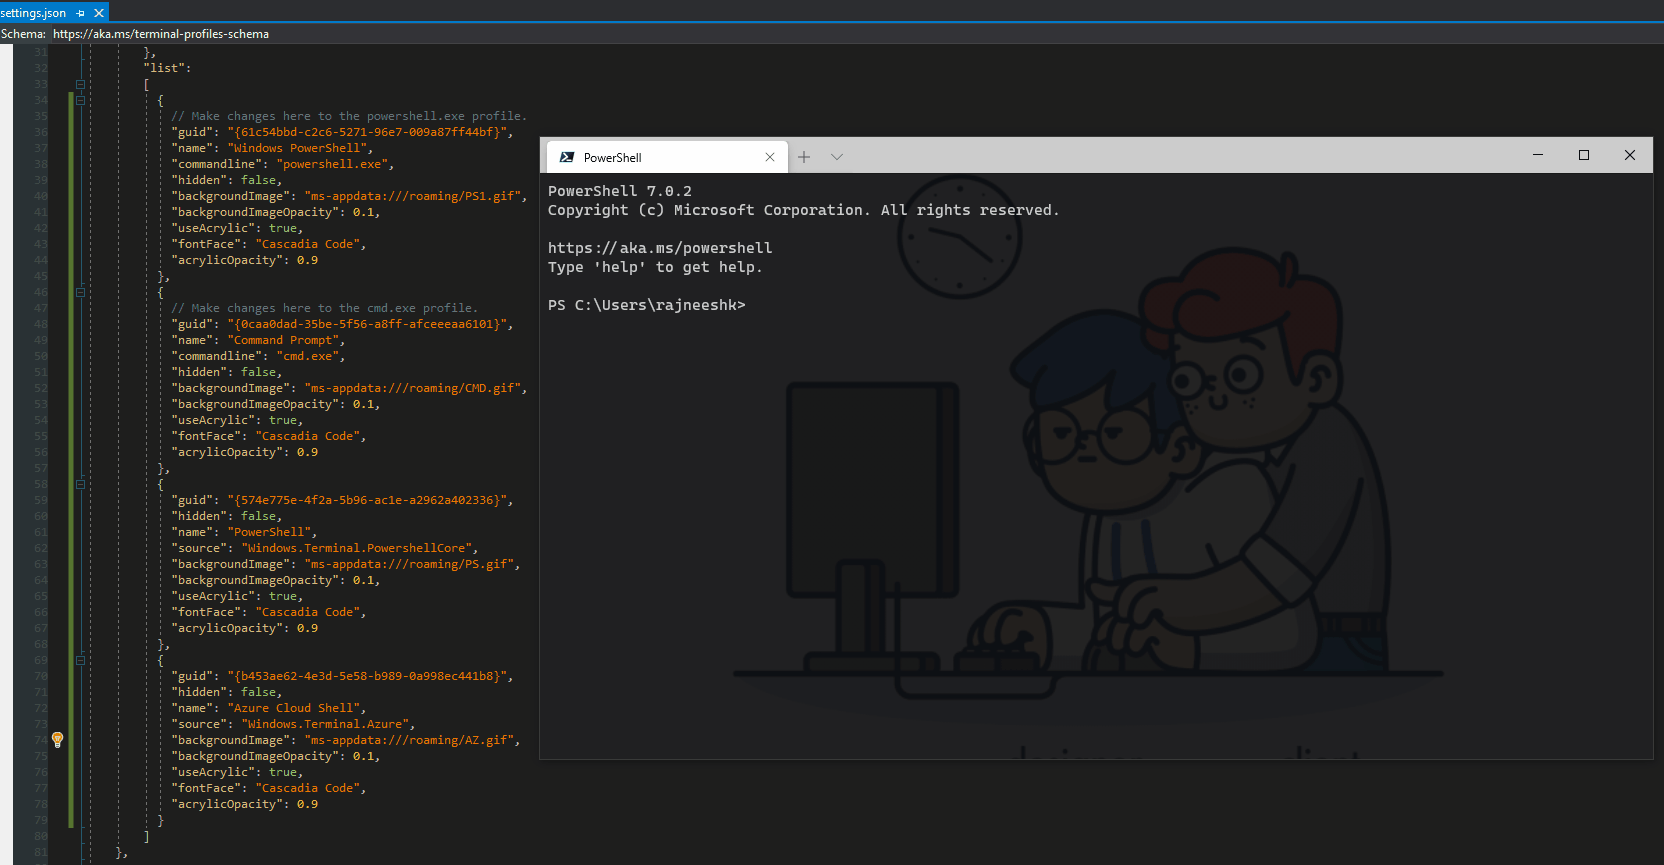
Step 5: Added below section in each list item
"backgroundImage": "ms-appdata:///roaming/<Your GIF>",

"backgroundImageOpacity": 0.1,

"useAcrylic": true,

"fontFace": "Cascadia Code",

"acrylicOpacity": 0.9
Step 6: To apply above settings click on down arrow -> Settings (Ctrl +,) it will open settings.json in an editor (for me its VS 2019) and do add code under each list item you want to customize. The result will be as below 😊
Step 7: If you want to change color scheme, you can add new scheme in settings.json or change the any of the available scheme (to find available scheme, use Ctrl + ALT and click on Settings button.)